
Brew day and batches
A batch is one brewing of a recipe. It freezes a copy of the recipe and the equipment profile at the moment you start, so editing the recipe later never changes what the batch says you brewed. Everything you measure, read, taste and photograph on the way lands on it, next to what the recipe predicted, which is the question the batch page is arranged around: how did this differ from the plan?
Starting a batch
Section titled “Starting a batch”Press Brew in the recipe editor’s header. The dialog names the batch after the recipe and the date, takes a brew date, and offers one tick box: Deduct from inventory, off by default, which takes the recipe’s ingredients out of your cupboard oldest lot first in one undoable step. Start brew day creates the batch and opens brew-day mode.
Pick a date after today and the button reads Plan this brew instead: the batch is created as planned and opens on its own page, where the yeast panel sizes a starter for it and the calendar shows the starter day. When the day comes, Start brew day on the batch page opens the checklist.
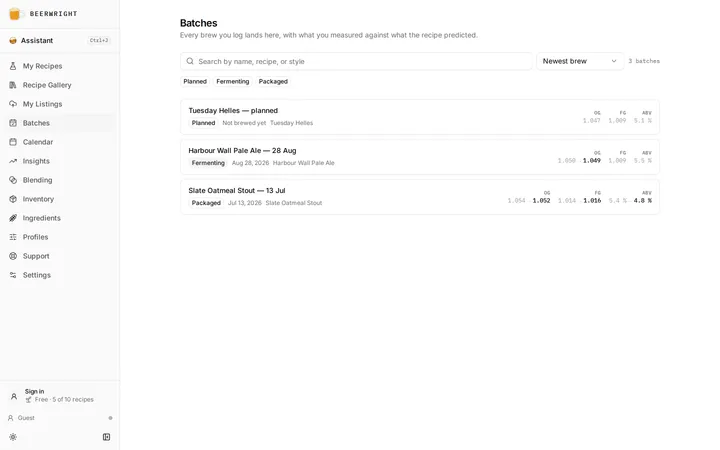
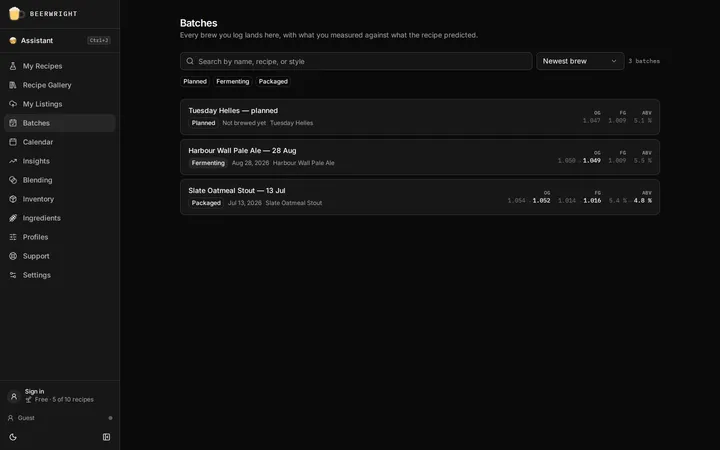
The batches page lists every one, newest brew first, with its status, the recipe it was brewed as, and the predicted and measured OG, FG and ABV side by side. It is a log, not a second recipe list.
Status
Section titled “Status”A batch moves through Planned, Brew day, Fermenting, Conditioning and Packaged, with Archived off to the side for the ones you are done with. Any move is allowed in either direction. A brewer who tapped Packaged a day early has to be able to go back, and pretending otherwise only teaches people to lie to the app.
While a batch is still planned there is no beer to measure yet, so the panels about one wait with a line each rather than showing you an empty form: measurements, the fermentation readings, the live chart, the prediction table and the tasting sheet. They keep their headings and their places on the page, and they open when you start brew day.
Brew day is the one status with color on it, because it is the one that means something is happening right now, on a burner, unattended.
If the recipe has changed since the batch was made, the batch says so and offers Update to current recipe. Once brew day has started the copy is fixed, since updating it would renumber the steps and lose your ticks and timers, and the notice explains that. A brewed batch is supposed to disagree with the live recipe, so it shows no notice at all.
Next steps
Section titled “Next steps”While a batch is fermenting or conditioning, the top of its page lists what is still to come: each temperature change from the recipe’s fermentation schedule, with the temperature and how long it holds; the dry hops; any cellar task you scheduled; and packaging, on the day the schedule ends. Each line carries its date and how far off it is, and a step whose day has passed stays on the list, in the warning color, until it is done rather than quietly disappearing. A task you scheduled has a Done button here as well as on the calendar, and it is the same tick either way.
This is the calendar seen from one batch, so the two never disagree. When nothing is left, the section says so and suggests packaging.
Brew-day mode
Section titled “Brew-day mode”Brew day on the batch page opens the checklist, built for a tablet propped by the kettle: one column, in order, big enough to hit with wet hands at arm’s length, and every interaction one tap.
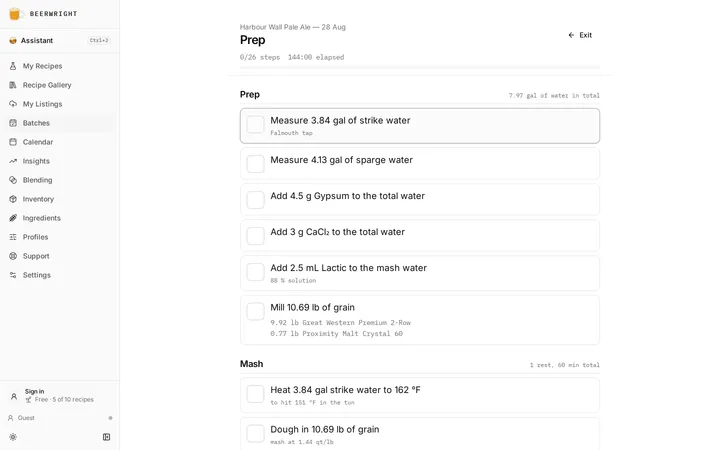
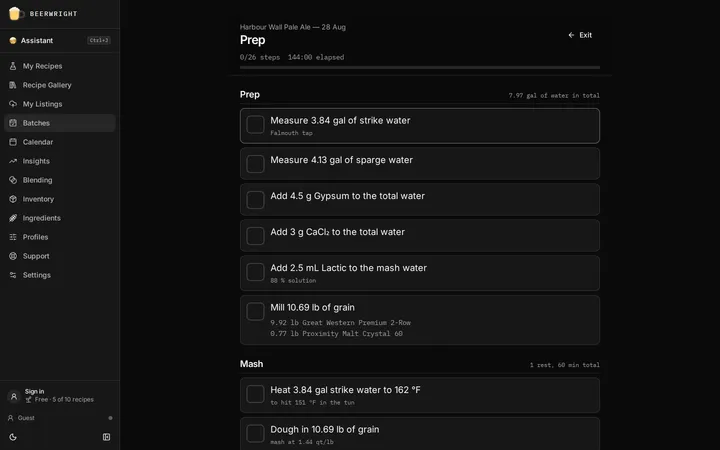
The steps come from the batch’s frozen recipe and the equipment profile, and every number on them comes from the same engine as the editor: strike volumes and temperatures, infusion volumes, the whole water waterfall. The phases run Prep, Mash, Sparge and lauter, Boil, Chill and transfer, Pitch and Wrap up. In the boil, the hops and the misc additions are one list sorted by the clock, because what matters at the kettle is the time, not whether the thing in your hand is a hop or a whirlfloc tablet. Reminders from your equipment profile join the same list, one row each time one comes due, so a bucket you swap every 30 minutes gets its own row and countdown at each swap.
Every step with a duration has a timer. Press it and it counts down from a fixed start, so a locked screen, a throttled tab, a reload or a second device all show the same remaining time. A boil addition has no button to press, because it runs on the boil’s own clock: a 10-minute hop in a 60-minute boil reads 50:00 the moment you start the boil. At zero the row turns amber and you get a beep, and we keep beeping until you tick the step or press Quiet. You set how far ahead we warn you and how often we beep with Warn me ahead and Keep beeping, in Settings → Notifications.
Two of the steps carry a form. Record pre-boil gravity and volume comes at the end of the sparge rather than the start of the boil, because that is the last moment the reading means anything. Record original gravity and fermenter volume comes after pitching. Both write straight onto the batch, with the same corrections the batch page applies.
Ticks and timers are saved, not held on the screen. They survive a reload, a sleeping tablet and a second device. Finish brew day moves the batch to Fermenting.
The brew sheet prints the same checklist from the same builder, for the brewer who wants paper near the burner.
Alerts on your phone
Section titled “Alerts on your phone”Brew day can reach a phone in your pocket with Beerwright closed. We send a notification as far ahead of each addition, reminder and timer as Warn me ahead says, and another when it is due. If the step is still unticked we send the due one again, up to five times. Ticking the step or pressing Quiet on any device stops the rest.
Turn it on with Alert me when timers finish on brew day, or with Brew-day alerts on this device in Settings → Notifications, which names the device it is switched on for, so you can tell the phone from the tablet. You need an account for this, since the notifications come from your workspace rather than from the page. On an iPhone or iPad it only works once you have added Beerwright to your home screen. In a plain Safari tab we can only beep while brew day is open.
The stage cards
Section titled “The stage cards”A batch page is arranged by stage. Under the header and Next steps sit four cards, always in brewing order: Brew day, Fermentation, Packaging and Tasting. Each holds what you do at that stage:
- Brew day: the yeast and starter, the brew-day measurements, kettle pH and the stock deduction.
- Fermentation: your readings, the device chart and the yeast harvest.
- Packaging: final gravity, the packaged volume, the priming or regulator calculator and the keg weigh-in.
- Tasting: your tasting notes.
The card for the stage the beer is in opens by itself: Brew day while the batch is planned or brewing, Fermentation while it ferments, Packaging at conditioning and Tasting once it is packaged. A finished stage folds to one line of what you recorded in it, such as Brew day · OG 1.052 · 20.1 L into the fermenter · pH 5.3 · stock deducted, so you can see it at a glance and open it to correct something. A stage the beer has not reached says when it opens. You can open any card yourself, and several at once, and changing the status puts them back.
A planned batch opens on the starter, because that is the one job the week before brew day, and the measurements under it wait until the batch is brewed. While the beer is fermenting or conditioning, the folded Fermentation line has its own Add reading, which opens the card with the cursor in the gravity field.
The record sits below the cards and is never folded: predicted against actual, the equipment feedback, the cost, then notes, journals and photographs.
Measurements
Section titled “Measurements”The Brew day card takes the readings a brew day produces: pre-boil gravity and volume, post-boil gravity and volume, original gravity and the volume into the fermenter. Final gravity and the packaged volume are on the Packaging card, since that is where they are needed. Every one of them is optional, and you can clear any of them.
Each gravity field has an instrument helper. Give it a refractometer’s Brix or a hydrometer reading and a sample temperature and it corrects for you. Once the OG is in, the helper on the final-gravity field switches into fermenting mode, the correction that stops a mid-fermentation refractometer reading coming out twenty points high. The volume fields correct for hot wort, which is bigger by about four percent near boiling, so 26 liters at 98 °C is stored as the 25 it will be when cold.
If your original gravity lands over the recipe’s target, we work out the water that would bring it back down. The line sits under the two fields that hold the sum, here and on brew day: You are 8 points over. Adding 3.04 L of water brings 1.058 down to 1.050 and leaves you 22.04 L in the fermenter.
Water thins the hops as well as the sugar, so the bitterness and the color come down by the same proportion, and anything going into the fermenter after the boil should be water you would drink. We apply none of it for you. Pour the water, read the fermenter and the hydrometer again, and type what you find, because those are the readings you actually took. You will see nothing when the gravity is at or under target, or less than a point over, where the water would be a splash a hydrometer cannot resolve.
Keg weigh-in, on the Packaging card, turns two weights into a packaged volume: the keg empty, the keg full, and the beer’s gravity, which the readout names. Nothing is saved until you press Use as packaged volume. It appears on a beer being kegged, since a bottling bucket can be read off the side and a sealed keg cannot.
Predicted against actual
Section titled “Predicted against actual”The Predicted vs actual table is the reason to measure. Each vital shows the recipe’s prediction, your reading and the difference, with an empty cell where you did not measure, never an echo of the prediction. Below it: the actual ABV, the apparent attenuation against the yeast’s band, and the packaged yield against the plan.
After two measured batches on the same equipment profile, the page can tell you the profile is running differently: the median measured mash efficiency, brewhouse efficiency and boil-off against what the profile says. Update profile applies them in one undoable change, and says what each one does. Your mash efficiency and boil-off rate move the gravity and the volumes we predict for every recipe on that profile; the brewhouse figure we keep as your record of how the whole day ran, and predict nothing from it. One batch is an anecdote, which is why it waits for two. A built-in profile cannot be edited; duplicate it on the equipment tab first.
Fermentation readings
Section titled “Fermentation readings”On the Fermentation card’s Readings panel, type a gravity and a temperature, set the day it was taken if that was not today, and press Add reading as often as you take one. The sparkline draws the gravity with the temperature as a thin line on its own scale, and what you read off it is the plateau. Once it has held, Use as final gravity on the newest reading copies its gravity into the batch’s final gravity, and the ABV stops being a prediction.
With a device in the fermenter, the Live fermentation panel charts its readings all the way down with your hand readings on top. Where the two disagree, and they do, because a Tilt drifts as krausen sticks to it, the picture is the calibration. The panel also gives the latest gravity and temperature, the change over the last day, the apparent attenuation, and whether it looks finished. The charts come with the Beerwright plan; the readings are kept whatever plan you are on.
Yeast, cost and inventory
Section titled “Yeast, cost and inventory”The Yeast panel sits at the top of the page, above your measurements, because a starter is built days before you brew. It records which jar you are using, from the packs and harvested jars in your inventory, and counts the generations for you. While the batch is still planned the button reads Use this jar, because a starter empties the pack before brew day; from brew day on it reads Pitch it and does both at once. Either way the jar comes off your shelf there and then.
When none of the recipe’s strain is on your shelf, the panel offers the pack the recipe planned with instead: the strain, how many packs, the date you gave it on the recipe and the starter you sized there. Use the planned pack takes all of it in one press, so nothing you set on the recipe has to be typed again. Nothing moves in your inventory, because nothing was on the shelf to move.
If the pack in your hand is not the one you planned, open Using a different pack? (or Not in your inventory? when you do have the strain stocked) and tell us what it is: the culture, whether it is liquid or dry, how many packs, and its date. The date can be the made-on date or the best-by printed on the pack. We size the starter from that just as we would from a jar.
Once a culture is chosen, the panel says whether it has only been taken or is already in the wort, and what starter it is getting. A starter you planned on the recipe comes along with the culture, and if the jar going in is older or smaller than the pack you planned for, the panel says the starter now falls short. Size the starter (or Resize) opens the same calculator the recipe editor uses, run against the cells this jar still has rather than a fresh pack’s, and the batch keeps what you save. A jar that needs no starter says so, and dry yeast is never offered one. Pitch it stamps the moment the yeast went in, when you are ready. You do not have to come back here for that: if you are working through brew day, ticking the pitch step on the checklist records the same moment, so the panel and your list agree without you telling us twice.
After fermentation, the Harvest panel further down the page puts what you saved back on the shelf as a new lot, with its generation and its date on it.
The Cost panel shows what the batch cost from the lots it consumed, frozen at the moment of deduction. Repricing a sack must not move last week’s brew.
The Inventory panel deducts the batch’s ingredients if you did not at the start, shows exactly what will move first, and offers Return to stock if the brew is not going ahead.
Notes, tasting and photographs
Section titled “Notes, tasting and photographs”Notes are kept per stage, so what happened in the mash and what happened in the fermenter do not end up in one paragraph.
Tasting is a BJCP scoresheet: aroma, appearance, flavor, mouthfeel and overall, out of fifty, in half points, plus a set of descriptor toggles for what you could actually taste, whether or not it belongs. Esters are the point of a hefeweizen, so ticking one is not admitting to a fault. Score a few batches and Insights can start telling you which of your brew days made the better beer.
Photos keep the beer’s picture beside its numbers: up to twelve per batch, resized on your device before upload. Removing one is the single action on the page that undo cannot reverse, and it asks first.
Journals
Section titled “Journals”Under the notes, a batch lists the journals written about it, and Start a journal begins one. It opens on a new page that already carries this batch’s Recipe block, so you are writing about the right beer from the first line rather than telling the page what it is about. Add a Fermentation chart next and it starts on the same batch.
Once you keep a journal, Add to a journal… beside it puts this batch on a page you already have, rather than starting another one. Pick the journal and we add the Recipe block and take you there.
A journal is the prose beside the record: photographs of the krausen, what the neighbors said, the week you forgot about it. Any number of them can be about one batch, since a split batch is two stories, and one of them can be about several, which is how a barrel or a beer brewed three times ends up on a single page.
Deleting a batch
Section titled “Deleting a batch”Delete on the batches page removes the batch and everything measured on it; the recipe is untouched. The dialog offers to put the ingredients back in stock, off each time it opens, because deleting is both “this brew never happened” and “tidy up a batch from 2023”, and only the first should move stock.
Related
Section titled “Related”- The brew sheet, for the printed checklist.
- Fermentation devices, for the live chart.
- Inventory and shopping, for deduction and cost.
- The calendar, where the batch’s dates land.
- Insights, for what many batches add up to.
- Journal, for the story beside the record.
Something wrong on this page? Tell us.